We are going to use it later to create some nice photo effects with using pictures.
Friday, February 1, 2008
The Fastest Glass Ball
Step 1. Create a 600 x 600 pixels, 72 pixels/inch, RGB Mode, White background image
We are going to use it later to create some nice photo effects with using pictures.
Step 2. Create a new layer and paint it with black color. Remember to press D to get to default colors for the foreground and background colors.
Step 3. Go to Filter > Render > Lens Flare to create lights and change the brightness to 150 as shown
Step 4. Go to Filter > Distort > Polar Coordinates and select Polar to Rectangular as shown below
Step 5. Select Image > Rotate > Flip Vertical and you will get something like this:
Step 6. Now one more time Filter > Rotate > Polar Coordinates, and this time select Rectangular to Polar.
We are going to use it later to create some nice photo effects with using pictures.
Creating a Rotating Ball
Step 1. Create a new file of 400 pixels, 400 pixels, 72 pixels/inch, RGB mode, and white background; fill the new document with color black.
Step 2. Now go to Filter>Render>Lens Flare and use these settings.
Step 3. Go to Filter>Texture>Patchwork
Step 4. Take a look of your image. You should have something like this.
Step 5. Then go to Filter>Distort>Spherize apply these settings.
Step 6. Press Ctrl+F twice to use the same filter again.
Step 7. Now select the Elliptical Marquee tool and starting from the upper left corner, holding Shift Key make a selection trying to include the ball.
 and starting from the upper left corner, holding Shift Key make a selection trying to include the ball.
Step 8. Then go to Select>Inverse. Press Delete to inverse selection, Press Ctrl + D to deselect.
Step 9. Go to Filter>Brush Stroke>Accented Edges and apply the following settings.
Step 9. Go to Filter>Brush Stroke>Accented Edges and apply the following settings.
Step 10. Your image should be look like this. Make the disco ball a bit smaller by activating the transform Tool pressing (Ctrl+T)
Step 11. You can add some strokes using the following command. Edit > Stroke
Step 12. Selete the background layer and fill it with black or any color you want.
Step 13. Finally you can add some sparks using the brush from the tool pallete use these sittings.
Step 14. Your final image should be look like this.
Thursday, January 31, 2008
Creating Backgrounds with Patterns Using the Cookie Cutter Tool
This process involves 2 steps:
1. Creating the pattern
2. Creating the Background using Edit > Fill Selection
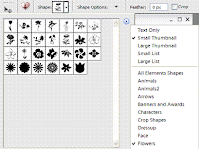
Step 2. Select the Cookie Cutter Tool ( ) and look at the Top of the Screen. Change the Shape Options and choose Flowers as shown below:
Step 3. Select any Flower shape you want and make a small selection inside your 100 x100 image.
1. Creating the pattern
2. Creating the Background using Edit > Fill Selection
Let's create the Pattern:
Step 1. Open Photoshop and create a new 100 x 100 pixels, 300 pixels/inch, White Background.
Step 1. Open Photoshop and create a new 100 x 100 pixels, 300 pixels/inch, White Background.
Step 2. Select the Cookie Cutter Tool (
 ) and look at the Top of the Screen. Change the Shape Options and choose Flowers as shown below:
Step 3. Select any Flower shape you want and make a small selection inside your 100 x100 image.
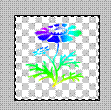
Step 4. You will notice that the Cookie Cutter Tool cuts some white pixels from the background.
Step 5. Press Ctrl + Click on the layer thumbnail to select only the shape
Step 6. Choose any gradient color and paint those pixels.
Step 7. Select >Deselect or just Ctrl + D.
Step 8. Select > All
Step 9. Edit > Define Pattern from Selection
Step 10. You can name your pattern or just use the default name. Click OK.
Step 11. Minimize your Image and create a 800 x 800 pixels, 300 pixels/inch, White background
Step 12. Create a New Layer
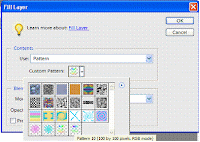
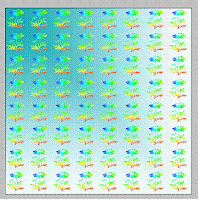
Step 13. Edit > Fill Layer, select patterns, and select the pattern you have created.
Step 15. Change the background color and enjoy your creation!!!
Tuesday, January 22, 2008
Photoshop Digital Frame Effect
This tutorial was created with Photoshop Elements 4. Simple steps you can use it with Photoshop Cs3 as well.
Step 1. Create a 800 x 800 RGB mode, 300 pixels/inch, white background image
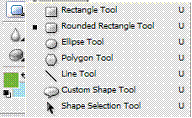
Select the Rounded Rectangle Shape Tool and create a rectangular shape as shown
Step 1. Create a 800 x 800 RGB mode, 300 pixels/inch, white background image
Select the Rounded Rectangle Shape Tool and create a rectangular shape as shown
Step 2. Keeping the shape Tool selected press Ctrl + T to open the transform Tool , Hold Ctrl key and change the perspective of the shape from the corners as shown below
Step 3. Open the Styles and Effects Palette and select Inner Glows. Click on the Small Border Effect. Next select the Patterns option and click on Brushed metal effect. Look at the picture below
Step 4. Duplicate the Shape Layer by right clicking on the shape layer and click on Duplicate layer. Ctrl + T to transform the duplicate layer and resize it to have another smaller frame inside the first one.
Step 5. Don’t forget to hit ENTER key or just click on the Commit button to finish the command.
Step 6. Apply Bevels Effects as desired to both layers. Now we are ready to move a picture inside the frame. Open any picture with Photoshop. I will open a picture from my son Joshua by selecting file > Open.
Step 7. Using the Move Tool, Move the picture to your new Photoshop file. Holding Ctrl Key you can resize it and get a perspective as shown. Finally you can get any gradient background for your new Photoshop creation. Using the rounded rectangle shape final you will get the following Frame.
Friday, January 18, 2008
Creating Frames Using Custom Shapes
Step 1. Create a new 600 x 600 pixels, 72 pixels/inch, RGB Mode, White background
We are going to create a background with patterns using Photoshop’s fancy shapes.
We are going to create a background with patterns using Photoshop’s fancy shapes.
Step 2. Select the Custom Shape Tool  which is located just below the Gradient Tool. By default the heart shape is selected.
 which is located just below the Gradient Tool. By default the heart shape is selected.
Step 3. Click on the arrow located next to the heart shape and get more shape options.
Step 4. Select the Ornaments Option and we can use these shapes to create amazing patterned backgrounds.
Step 5. You can just get your mouse drag some shapes on your canvas. Every time you create a shape a new shape layer adds to your Photoshop file. Remember that shapes are Vector Images and if we need to change color of these shapes we have to simplify the layers or rasterize the shapes. Before doing that lets Merge all shape layers into one layer.
Step 6. Make the Background layer invisible by clicking on the small eye on the left of the background layer.
Step 7. Starting from the Top layer, select Layer > Merge Visible. Next Ctrl + Click on the Shapes Layer thumbnail
Step 8. Change the shape colors using gradients.
Step 9. Finally, color the background using gradients
Thursday, January 17, 2008
Creating Text with Flowers Pixels
Sometimes you need to create nice text colors and what you can do is just take those multiple pixels from other images. Flowers have lots of color and Photoshop can use those colors in 3 steps.
Step 1. Create a new 800 x 500 pixels, 72 pixels /inch, White background, RGB color mode.
Type a text, anything you want but just make sure to use some tick fonts like Impact or Wide Latin.
Step 3. Open the flower with Photoshop
Using the Move Tool , move the flower over the text layer, resize it to make sure all your text is covered. You will end up with 3 layers as shown
Step 4. Keeping the Flower layer selected go to Layer > Group with Previous or just press Ctrl + G
Step 5. Final result
Step 1. Create a new 800 x 500 pixels, 72 pixels /inch, White background, RGB color mode.
Type a text, anything you want but just make sure to use some tick fonts like Impact or Wide Latin.
Step 2. Open any flower picture. You can find nice high quality pictures at http://www.morguefile.com/ and save it in your computer. By default is going to save in My Pictures Folder inside My Documents Folder.
Step 3. Open the flower with Photoshop
Using the Move Tool
 , move the flower over the text layer, resize it to make sure all your text is covered. You will end up with 3 layers as shown
 Step 4. Keeping the Flower layer selected go to Layer > Group with Previous or just press Ctrl + G
Step 5. Final result
Tuesday, January 15, 2008
Fill Layers with Your Own Patterns
This process involves 2 steps:
a) Create the pattern
B) Applying The Pattern
You can apply these patterns to fill layers creating background images or just apply to create Magnificent Text. In the following steps you have these 2 examples:
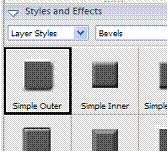
Step 11. Finally, you can apply any other layer effect like Simple Outer as shown
a) Create the pattern
b)Use the Pattern to fill a Layer
A) Create a Pattern
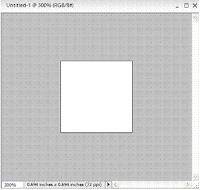
Step 1. Create a 50 x 50 image, 72 pixels/inch, white background, RGB Mode. Use the Zoom Tool to zoom in a couple of times to make the image larger so you can see it better.
A) Create a Pattern
Step 1. Create a 50 x 50 image, 72 pixels/inch, white background, RGB Mode. Use the Zoom Tool
 to zoom in a couple of times to make the image larger so you can see it better.
Step 2. Change the foreground and background colors of your preference
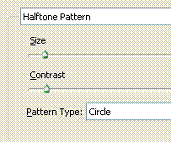
Filter > Sketch > Halftone Pattern, select the following settings:
Filter > Sketch > Halftone Pattern, select the following settings:
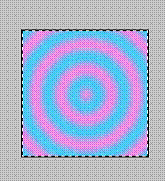
Step 3. Click on Select > All. You will notice that the all square gets selected. Now go to Edit > Define Pattern from Selection. You can rename it if you want. Click OK.
B) Applying The Pattern
You can apply these patterns to fill layers creating background images or just apply to create Magnificent Text. In the following steps you have these 2 examples:
Step 4. Create A 600 x 600 pixels, 72 pixels/inch, White background, RGB color mode
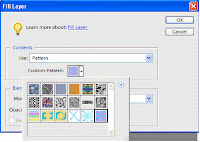
Edit > Fill Layer, in the Fill Layer dialog window, select Use patterns. In the Custom pattern option select the pattern you just have created, See the image below:
Edit > Fill Layer, in the Fill Layer dialog window, select Use patterns. In the Custom pattern option select the pattern you just have created, See the image below:
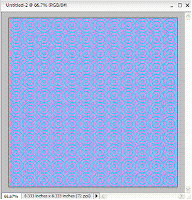
Final Background Image
c) Apply the Pattern to create magnificent Text Effects.
Step 5. Create a 800 x 400 pixels, 72 pixels/inch, white background, RGB color mode
Step 5. Create a 800 x 400 pixels, 72 pixels/inch, white background, RGB color mode
Step 6. Color your background image with a solid color of your preference.
Step 7. Select T for Text, type “Magnificent”, make sure you select a tick font like Impact to get better results. I used Wide Latin Font.
Step 8. Keeping the text Layer selected, Layer > Simplify Layer or Layer > Rasterize >Type to change the vector to Pixels.
Step 9. Holding Ctrl key, click on the text layer thumbnail to select the text
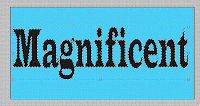
Step 10. Edit > Fill Selection, click OK. Ctrl + D to deselect the text
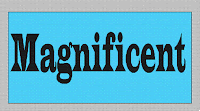
Step 11. Finally, you can apply any other layer effect like Simple Outer as shown
Final Result
Subscribe to:
Comments (Atom)


